Where Should Crops Go in a Raised Bed?
An open square of soil is not automatically usable planting space. Before you decide where a crop belongs, check what that position will be like after the plant reaches full size.
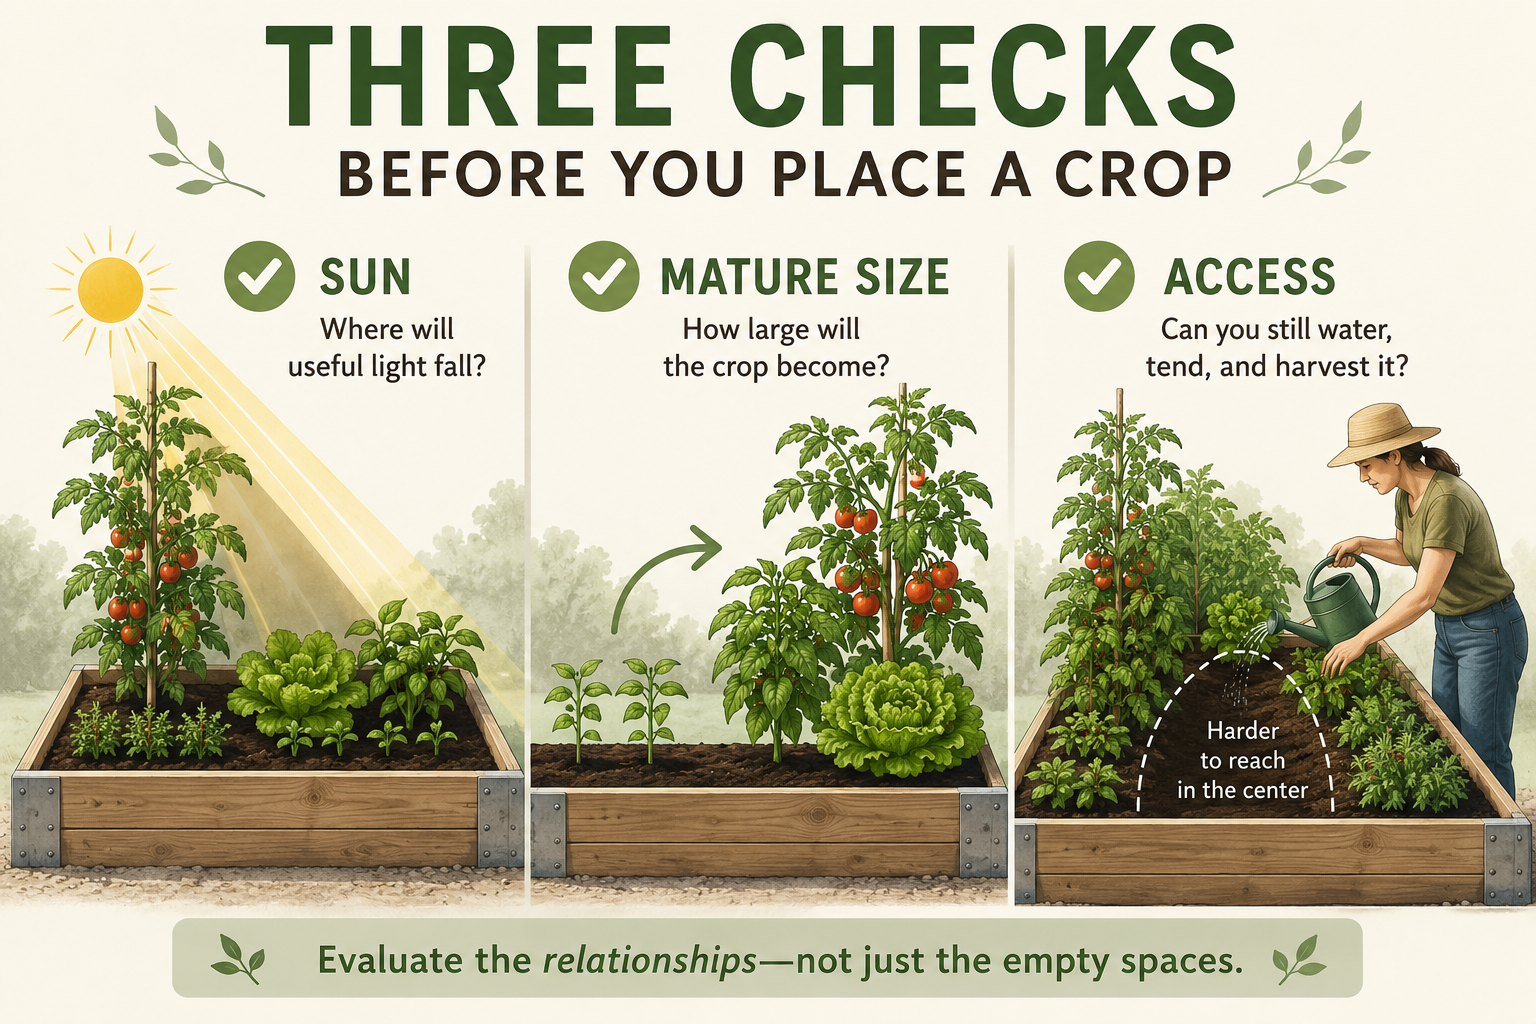
The best placement is one that gives the crop suitable light, enough room for its mature form, and a clear way for you to reach it throughout the season.
That means looking beyond the seedling in your hand. A small transplant may eventually become a wide canopy, a tall wall of foliage, or a vine that needs repeated training. Its final position can affect the light, airflow, and access available to everything around it.
Use three checks before you plant:
1. How much usable direct sun reaches this part of the bed?
2. How large will this crop and its support become?
3. Can you reach it for routine care and harvest without stepping into the bed?
You do not need a perfect layout to answer those questions. You need a realistic picture of what the bed will become.
Why Empty Space Is an Incomplete Answer
It is easy to plan a raised bed from above, as though every open area were equal. But the bed changes once plants begin growing.
A trellised crop may cast a moving shadow. A squash plant may extend beyond the spot where its stem enters the soil. A tomato may need room for a cage or trellis as well as a path from which you can tie, inspect, and harvest it. A crop placed comfortably at planting time may become hard to reach by midsummer.
The overlooked variable is the plant's 'working footprint'.
That footprint includes:
- the crop's mature height and width;
- its growth habit;
- its cage, stake, or trellis;
- the shadow created by the plant and support; and
- the side from which you need to maintain and harvest it.
Plan for that future footprint rather than the size of the seedling.
1. Check the Bed's Usable Sunlight
For the sunlight portion of the decision, use the Backyard Grow Co. Seasonal Sun Mapping System: observe the real bed, record when direct sun reaches it, and compare the pattern during the crop's relevant growing season.
Start with a clear-day check:
- Observe the bed several times from morning through late afternoon.
- Record direct sun and dappled light separately.
- Note the approximate time when a shadow enters or leaves the bed.
- Identify what creates the shade, such as a tree, fence, building, trellis, or tall crop.
- Divide the bed into smaller observation areas if one end receives a different pattern from the other.
For warm-season vegetables, a full-canopy observation is the most useful summer baseline. A bed that looks sunny before nearby trees leaf out may receive much less direct light later. For late-summer or fall planting, check again as shadows lengthen and existing crops reach full size.
Keep the actual hours and time-of-day notes. Labels such as "full sun" and "part sun" are useful summaries, but they are not defined identically by every source or plant label.
Then compare the observation with trusted guidance for the exact crop or cultivar. Fruiting crops generally need the strongest light, while some leafy and cool-season crops may be more flexible. That is a starting distinction, not permission to assume that every crop in a category has the same needs.
The goal is not to fill the brightest-looking space. It is to reserve the bed's best usable light for the crops that need it most.
2. Plan for Mature Size and Future Shade
Next, look up the crop's mature height, width, growth habit, recommended spacing, and support method.
Use the exact variety whenever possible. "Tomato" is not a complete size description. A dwarf tomato, a determinate tomato, and a vigorous indeterminate tomato can create very different canopies and support needs. Bush and vining forms of other crops can differ just as much.
Ask:
- How tall and wide is this variety expected to become?
- Does it grow as a bush, vine, upright stalk, or spreading canopy?
- Will it need a stake, cage, or trellis?
- Will the support lean over or extend outside the bed?
- Which nearby crops could fall into its future shadow?
In Northern Hemisphere gardens, locate north on the physical bed before using it as a shortcut. Depending on the bed's orientation, north may be a long side or a short end. Testing a tall or trellised crop toward that edge or end is a useful starting point because it may reduce shade on shorter crops to the south. It is not a guarantee. Your observed sun pattern, bed orientation, slope, nearby structures, and season control the actual shadow.
A trellis also changes a crop's shape; it does not make the crop spacing-free. Vines still need the crop- and cultivar-appropriate spacing recommended by the seed packet, plant label, or a trusted Extension source.
Before planting, stand where the shorter neighboring crops will grow and picture the mature plant between them and the sun. If the predicted shadow covers a crop that also needs strong light, change one of the placements before either plant is committed.
3. Protect Access for Care and Harvest
A productive bed still has to be workable.
Start by marking the sides you can actually approach. A freestanding bed may be reachable from both long sides. A bed against a fence or wall is functionally one-sided, even if its physical width is the same.
Raised beds are commonly kept to about four feet wide when an adult can approach from both sides and about three feet wide when the bed can be reached from only one side. Treat those dimensions as maximum starting points, not universal targets. Your comfortable reach, height, mobility, tools, and balance matter more than a standard measurement.
Test the real bed:
1. Stand on the path without leaning your weight into the soil.
2. Reach toward each potential planting position.
3. Pretend you are tying a stem, checking the underside of a leaf, or lifting a ripe fruit.
4. Notice whether another mature crop would block that movement.
If you cannot comfortably perform those motions, the position is not fully accessible.
Paths are part of the bed's working geometry too. Leave enough room for the tools you actually use, whether that is a hose, harvest basket, wheelbarrow, kneeler, walker, or wheelchair. Where wheelbarrow or wheelchair access is needed, Oregon State University Extension recommends paths about three to four feet wide.
Put High-Touch Crops Where You Can Tend Them
Some crops ask for more frequent attention than others.
Trellised vines may need repeated training. Tomatoes may need tying and inspection. Beans, cucumbers, summer squash, strawberries, and other fast-producing crops may need frequent harvesting. Place these crops where their maintenance side remains open and reachable.
This is a usability recommendation, not a horticultural requirement. An edge is not automatically the best location if it has unsuitable light or creates a damaging shadow. Balance all three checks.
Also avoid using a sprawling crop as a gatekeeper. If its mature canopy is likely to block the plants behind it, move it, support it differently, or choose a smaller-growing variety.
Access affects plant health as well as convenience. When you can reach a crop easily, you are more likely to notice pests, train growth, remove damaged material, and harvest on time. Proper crop-specific spacing also supports air movement and allows foliage to dry more quickly after rain or dew. Intensive planting should not become crowding.
A Simple Pre-Planting Sequence
Before putting a crop into the bed:
1. Mark the usable light. Use your seasonal observation to identify where direct sun actually reaches the bed.
2. Picture the mature plant. Include the canopy, growth habit, recommended spacing, and support.
3. Forecast the shadow. Check which nearby crops may lose light as the plant grows.
4. Test your reach. Approach from the real path and mimic routine care and harvest.
5. Keep a maintenance side open. Make sure a trellis face, cage, or high-touch crop does not become trapped behind other mature plants.
If a position fails one check, adjust it before filling the rest of the bed around it.
Example: Choosing a Position for a Trellised Tomato
Imagine a freestanding raised bed that can be approached from both long sides.
The full-canopy sun observation shows that most of the bed receives about seven hours of direct sun, while the western end falls into tree shade earlier in the afternoon.
The gardener wants to place an indeterminate tomato that will be trained vertically.
Sun check: The tomato is a fruiting crop, so the gardener reserves a position in the stronger, longer-lasting light rather than the western end.
Mature-size check: The exact variety's guidance shows that it will need substantial vertical support and cultivar-appropriate spacing. The gardener locates north on the physical bed and tests a position toward that edge or end so the mature plant is less likely to shade shorter crops to the south. The observed sun map still confirms the choice.
Access check: The available path leaves the trellis face open for tying, inspection, and harvesting. The gardener avoids placing a sprawling crop at the corner that provides access to the tomato.
The result is not a complete bed layout. It is one suitable placement made from real light, mature form, future shadow, and maintenance access. The remaining crops can be evaluated one at a time using the same checks.
Adjust the Decision for the Bed You Actually Have
If the bed is against a wall or fence: Treat it as one-sided. Do not place a high-maintenance crop beyond your comfortable reach simply because the bed is technically narrow enough on paper.
If the bed has an irregular shape: Evaluate reach from each approach point. A corner or curved section can become inaccessible even when the bed's average width seems reasonable.
If you are adding more than one trellis: Forecast the combined shadow and leave a workable face for each support. A row of vertical crops can act like a wall once the canopy fills in.
If your mobility or reach is limited: Choose the bed width, height, and path width around your body and equipment. A narrower bed is not wasted space if it lets you care for every crop safely and consistently.
If you are replacing a finished crop: Do not count the expected opening as usable space until the existing crop is actually removed. Once the position is clear, recheck its light and access before choosing the next plant. Summer growth, lower seasonal sun, and nearby crops may have changed which part of the bed is usable.
From Usable Space to What to Plant Next: After you place the crop you started with, reassess the remaining bed in this order:
> Usable space → suitable placement → what to plant next
Identify the remaining light, reach, and unoccupied space; then use the guide to shortlist a seasonally appropriate next crop. Before planting that crop, run its exact variety through the same sunlight, mature-size, shadow, and access checks.
For a summer or fall opening, use your average first-frost date, the exact variety's days to maturity, and the bed's changing light to decide what still has time to grow. The existing article [Don't Plant Your Fall Garden Until You Calculate These 3 Dates] walks through that separate timing decision.
For a quick list of beginner-friendly crops and a simple planning page, download the What to Plant Next: Summer & Fall Garden Quick Guide.
[Get the free What to Plant Next guide]
The guide helps you narrow the seasonal crop choice after you have identified a workable place for it. It does not replace the need to check the exact variety, your local conditions, or the placement itself.